
Stable Diffusion Restore Faces Meaning + Fix Missing Setting
- Cole B.

In this post, I am going to cover everything you need to know about the stable diffusion restore faces setting.
Learning this setting helped take my faces in generated images from looking like Frankenstein to as realistic as an IRL photo.
So, if you want to learn how to make realistic images within Webui (automatic1111), then this guide is for you.
Let’s dive right in.
What Is Stable Diffusion Restore Faces?
The restore faces setting removes facial artifacts and improves facial features using two different techniques, CodeFormer or GFPGAN.
Here is an example of images generated using different restore faces settings:


Prompt: family photo of a gorgeous young daenerys targaryen queen wearing a beautiful intricately detailed dragon armor set in the style of stefan kostic, realistic, sharp focus, 8k high definition, insanely detailed, intricate, elegant, art by stanley lau and artgerm, cherry blossoms
As you can see, the restore faces setting improves the face of the image pretty reliably.
CodeFormer Vs. GFPGAN Settings
As I previously mentioned, CodeFormer and GFPGAN are both techniques used to restore faces.
I’ll give you a quick rundown of which one you should use:
CodeFormer: Best for most image restoration.
GFPGAN: I personally am not sure when GFPGAN is better than CodeFormer.
But if you want to learn in-depth about each technique, then I am going to expand upon them both below:
CodeFormer
CodeFormer uses a prediction-based network that discovers faces, tries to estimate the target face, and restores the image to match the target face.
GFPGAN
GFPGAN uses a pre-trained model for face restoration. This model is then used to transform layers in the image generation process to produce face restoration.
How to Add the Restore Faces Button in Webui (Automatic1111)
by default, the face restoration setting is hidden within the Webui settings, so I am going to show you how to add it to your UI.
Step #1: Access The Settings Menu

Click at the top to access the settings menu.
Step #2: Go To User Interface Tab
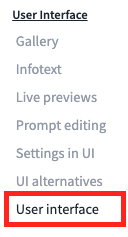
Along the left sidebar, there will be a menu for the user interface, which is where you will need to go.
Step #3: Add face_restoration To Quicksettings List

Click inside the quicksettings list and type “face” to find the face_restoration setting to add it to your UI.
Step #4: Apply Settings & Reload UI

After adding the restore faces setting, you must apply the setting and reload you UI for it to appear.
Comparison of Different Restore Faces Settings
So that you can make an informed decision on the best restore faces setting for you to use, I am going to show you some comparisons in order to illustrate the best settings.
CodeFormer Vs. GFPGAN
Example #1:


Prompt: realistic an african american young girl from over 10 with pastel brown hair and freckles and light blue eyes, sitting by a campfire in the style of artgerm and atey ghailan and mike mignola, vibrant colors and hard shadows
Example #2:

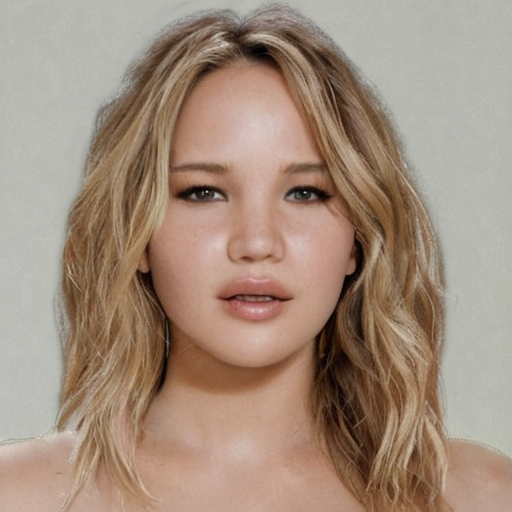
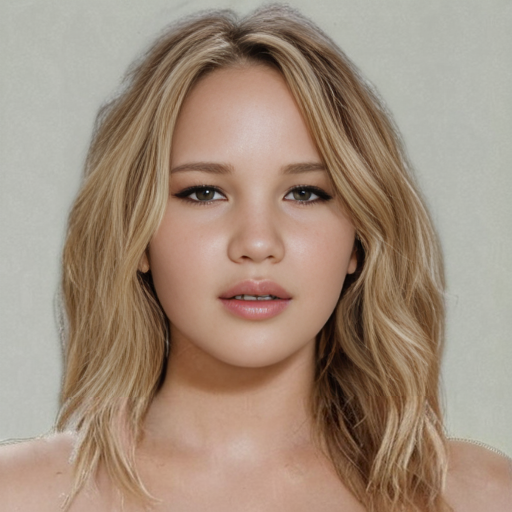
Prompt: Face portrait, Jennifer Lawrence, realistic, photo
Example #3:
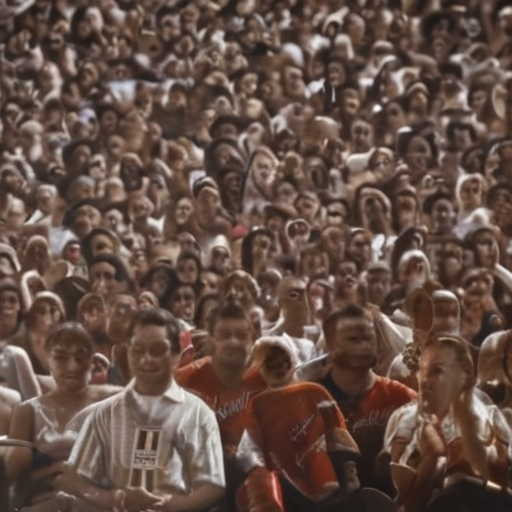


Prompt: basketball game, crowd, photo of crowd, audience, close up
CodeFormer Weights
CodeFormer has a selection of diferent weights from 0.0 to 1.0. This is going to control how much CodeFormers impacts the image generation process.
See the example below:


Prompt: face portrait, ryan reynolds, smiling, in park
As you can see, the higher the weight, the more restore faces tries to humanize the face.
At higher weights, you will see a reflection in the eyes and more pronounced facial hair.
Let Me Hear From You
That’s everything about the stable diffusion restore faces setting.
Now I want to hear from you:
What has been the best way to restore faces in your images?
Let me know by leaving a comment down below.