
Stable Diffusion Sampling Steps: Explained + Best Settings
- Cole B.
Today, I am going to explain how to use stable diffusion sampling steps (inference steps), what they mean, and the best settings to use.
Using the correct amount will either enhance the quality of your image or save you some much-needed time generating AI art.
So, if you want to master this stable diffusion setting, you’ll enjoy the tips in this guide.
Let’s dive right in:
What are Stable Diffusion Sampling Steps?
Stable diffusion sampling steps are layers used to remove noise and enhance the details of generated images.
Each step is like a sheet of noise being peeled off the image, with a more detailed image underneath each layer.

Although it might sound good to set sampling steps to the maximum, sometimes it can be counterintuitive to your efficiency in generating images.
I’ll explain why:
Effects of High vs. Low Steps
When generating images, there is a point when essentially all the noise is removed from an image.
This will depend on a variety of factors we will look at below, but whats important to note is that there is a certain point that increasing sampling steps will hinder your efficiency without giving you any extra details.
I will show you a graph I found from Reddit illustrating this:

As you can see, for the four samplers that were tested, 20 steps were enough to eliminate all the noise from the AI image.
Although this is limited data, it can suggest that for this specific set of settings, increasing the setting past 20 wouldn’t yield any beneficial results.
Best Sampling Steps for Stable Diffusion
The best sampling steps for stable diffusion will be generally 20-30 steps, but it will depend on the sampling method and CFG scale.
I am going to give some general guidelines, but a more detailed analysis will be in the next section below.
General guidelines for settings:
- Higher CFG Scale = Higher Sampling Steps.
- Even after noise is completely removed, images will still differ slightly with different step amounts.
- Most sampling methods need around 20 steps.
Sampling Steps Comparisons + Examples
I am going to show some comparison between steps and other parameters to help you identify the best amount for different settings:
Inference Steps vs. Sampling Methods
So this comparison will be between the 13 most commonly used sampling methods.
This table below will let us know if different amounts of steps should be used for different sampling methods:

Overall, most sampling methods make a complete image with 20 steps.
Some sampling methods work well below 20 which I will list below:
- DPM++ 2M
- DPM++ SDE
- UniPC
- Heun
- DPM2
- DPM adaptive
- LMS
1-50 Steps Comparison
This GIF is a god example of how quickly noise is removed and why steps beyond a certain point don’t have much impact. Further, emphasizing the point of having too many unnecessary steps isn’t beneficial.
Although, it is important to note that even at higher amounts, the image changes slightly. For instance, in this GIF around the eyes.
CFG Scale vs. Steps
This graph is going to demonstrate the impact of the the classical free guidance scale (CFG scale) on the amount of steps that should be used.
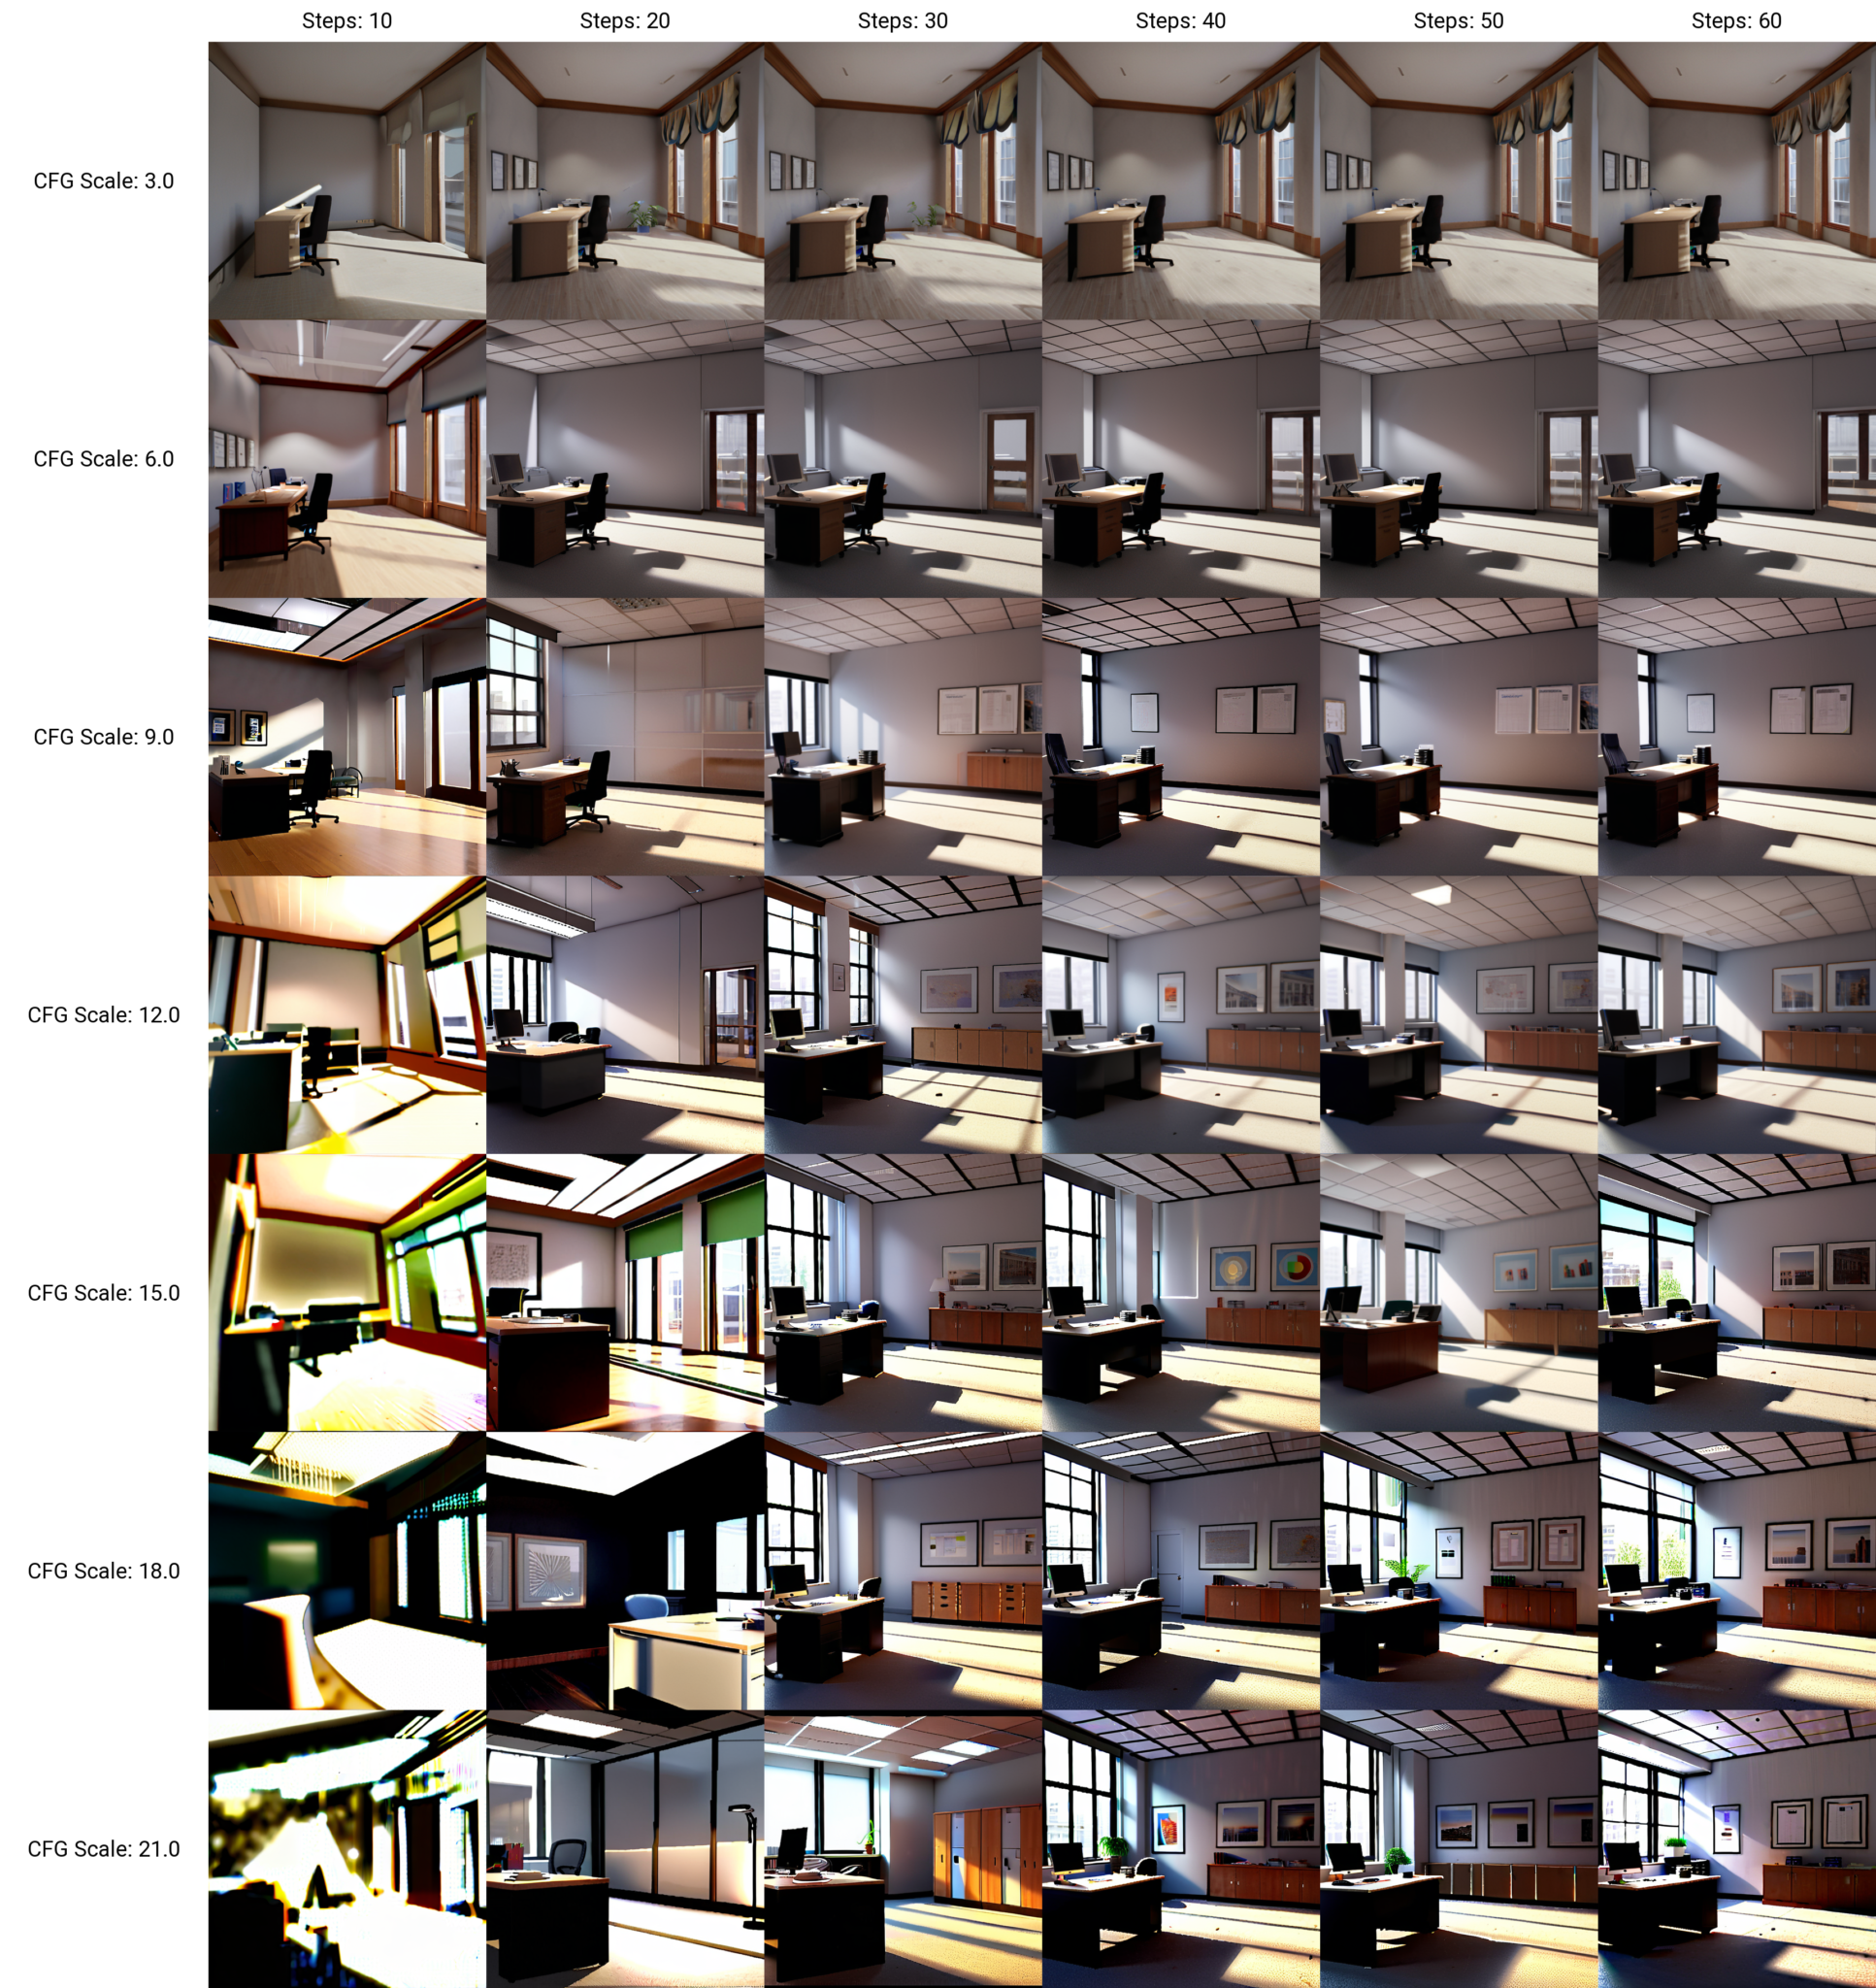
As you can see, having a higher CFG scale, increases the need for more steps to make a image that isn’t overly saturated.
Higher CFG Scale = More Steps
What Sampling Step Values Work For You?
I hope this guide to stable diffusion sampling steps helped you choose the right amount when you generate images.
Now I would like to hear from you:
Have you found any strategies or tips using sampling steps?
Let me know by leaving a comment below.